
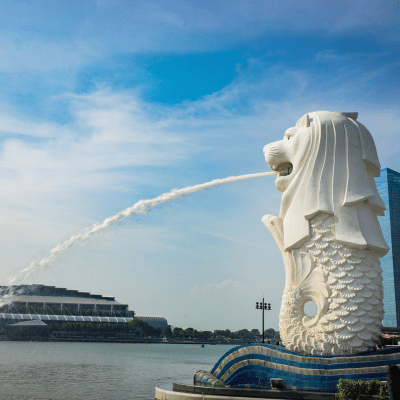
 Singapore
 Malaysia
 Indonesia
 Dubai
Dubai
 Thailand
 China
China
 Sri Lanka
 Cambodia
 Azerbaijan
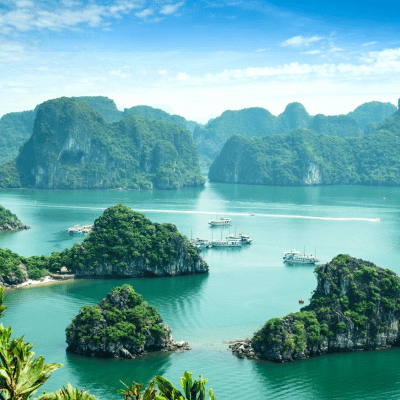 Vietnam
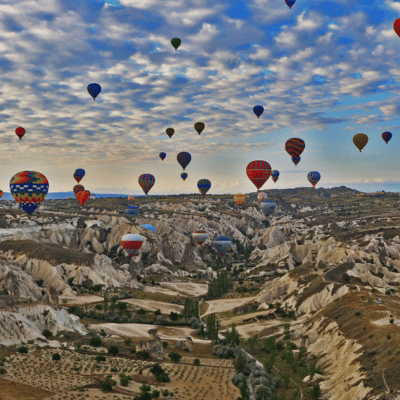 Turkey
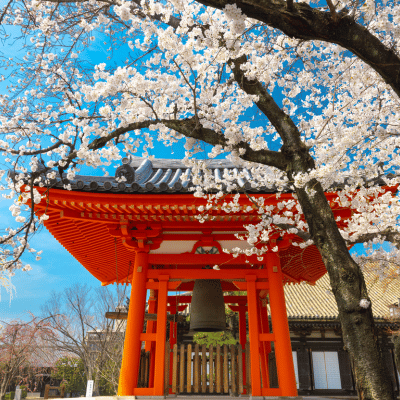 Japan
Japan
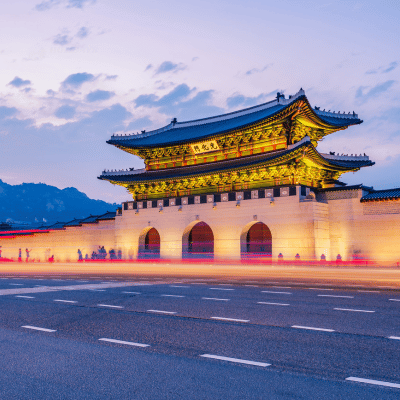 Korea
Korea
 Europe
 India
India
 Maldives
 Georgia
 Philippines
 Africa
 Central Asia
 Rojina Nakarmi
For many travelers, planning for an international trip can come with a lot of stress and anxiety. The time consuming visa procedures, hefty amounts of paper work required and costly visa fees certainly make the initial stages feel strenuous and taxing.
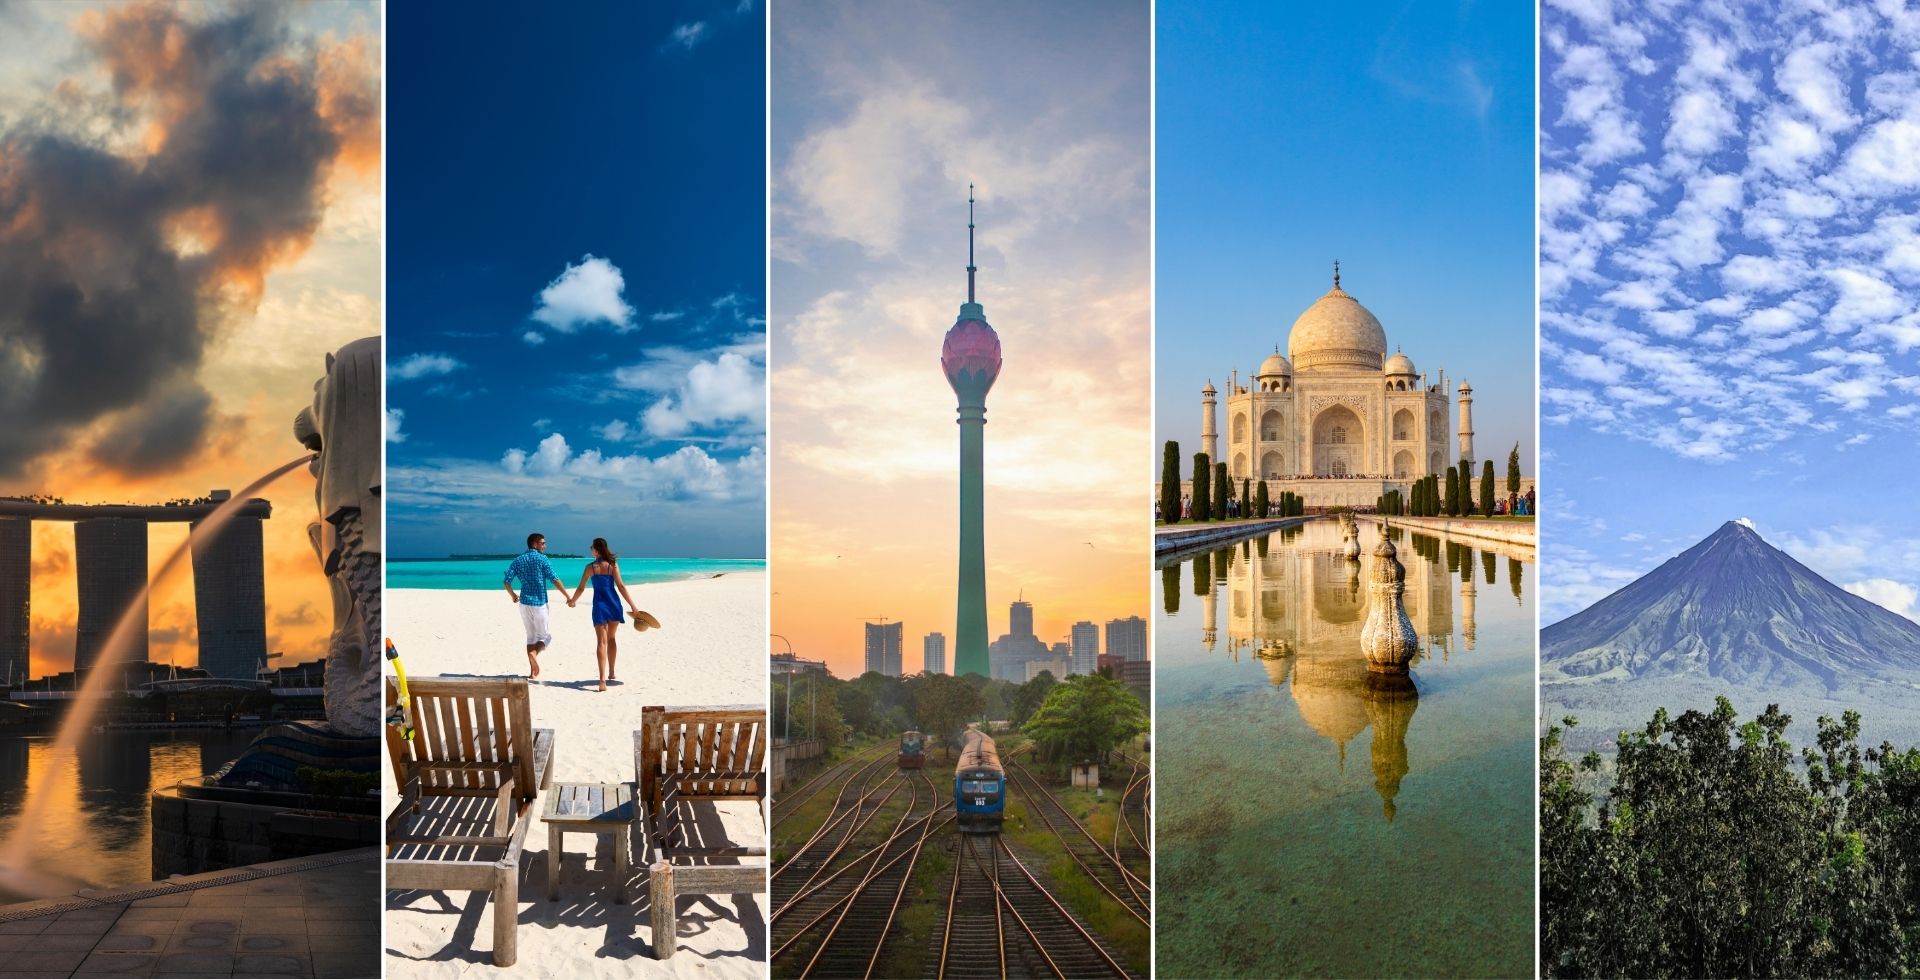
But what if there are destinations in Asia where you could travel that offer the opposite of these things, say, easy and simplified visa protocols? Nations like Singapore, India, Sri Lanka, Maldives, and Philippines provide Nepali visitors with relatively easier visa processes, making traveling feel effortless, easier, and more appealing.
Beyond their convenient visa procedures, these nations’ warm hospitality, diverse cultural heritage, rich history, and cost effective nature are a few other contributing factors attracting many Nepali tourists to the stunning destinations.
What You’ll Discover in This Blog:
- Country-wise visa requirements for Nepalese travelers
- Differences between visa-free vs. visa on arrival vs. ETA
- Essential documents to carry before you travel
- Step-by-step guide to applying for digital travel and arrival requirements
- Our top-selling travel packages for hassle-free international holidays
- Why travel with Holidays to Nepal?
- Frequently asked questions about visas, entry requirements, and international travel
Understanding Different Travel Authorizations
Different nations across Asia have their set of visa requirements and entry protocols. While on the one hand, destinations like India, Singapore, and the Philippines provide visa-free protocols, countries like Sri Lanka and the Maldives offer standard ETA and visa on arrival policies for Nepalese citizens.
To make things easier, we’ve highlighted the key differences between these visa entries.
- Visa-Free: This allows travelers to visit a nation without needing to acquire a prior visa, making the whole process instantaneously easier. But travelers may still be requested to show their return/onward ticket, proof of hotel booking, and other travel documents at the immigration border of the destination they’re planning to visit.
- Visa on Arrival: This means that one gets their visa after arriving in the nation. After landing, travelers fill out the visa form, pay the visa fee, and get the required visa in a digital/sticker format.
- ETA (Electronic Travel Authorization): ETA is a digital pre-screening travel permit that certain nations require from travelers from their departure date. It’s obtained online before one travels and is checked at the immigration border.
Country List and Overview Table
|
Nation |
Visa Requirements |
Duration of Stay |
Popular For |
|
Singapore |
Visa-free policy |
30 days |
Futuristic architecture, fun theme parks, cultural neighborhoods, and luxurious hotels |
|
India |
Visa-free policy |
No fixed tourist visa limit |
Ancient Hindu temples, sacred ghats, bustling cities, and colorful markets |
|
Sri Lanka |
ETA is required but completely free of cost since May 25, 2026. |
30 days |
Scenic tea gardens, Buddhist temples, and tranquil beaches |
|
The Maldives |
Visa on arrival policy |
30 days |
Luxurious overwater villas, golden beaches, and fun water sport activities |
|
The Philippines |
Visa-free policy |
30 days |
Island-hopping, ancient cities, and stunning beaches |
Major Attractions, Visa Information and Travel Tips
Now, let’s move to the main part of this blog, where you’ll discover in-depth information about the five nations. This section will cover these countries’ must see attractions, visa protocols/travel arrival cards, and so much more! We’ll begin by learning about Singapore, which sits high on the bucket list of many Nepali travelers.
Singapore - The Lion City

|
Official Name |
The Republic of Singapore |
|
Capital City |
Singapore |
|
Popular Landmarks |
Gardens by the Bay, Sentosa Island, Little India and Mandai Wildlife Reserve |
|
Entry Gateways |
Changi International Airport |
|
Time Zone |
Singapore Standard Time (SGT), UTC+8, 2 hours and 15 minutes ahead of Nepal |
|
Official Currency |
Singapore Dollars |
|
Visa Requirements |
Visa Free Policy |
|
Duration (Maximum Allowed Stay) |
30 Days |
Singapore has continuously thrived in the tourism world; for years this city-state has been a top pick for thousands of Nepali visitors, especially for those who are drawn to culture, adventure, and food.
Singapore At a Glance
Often called “a city in nature,” this nation is situated in Southeast Asia and is divided into various distinct regions for urban planning and sustainable development.
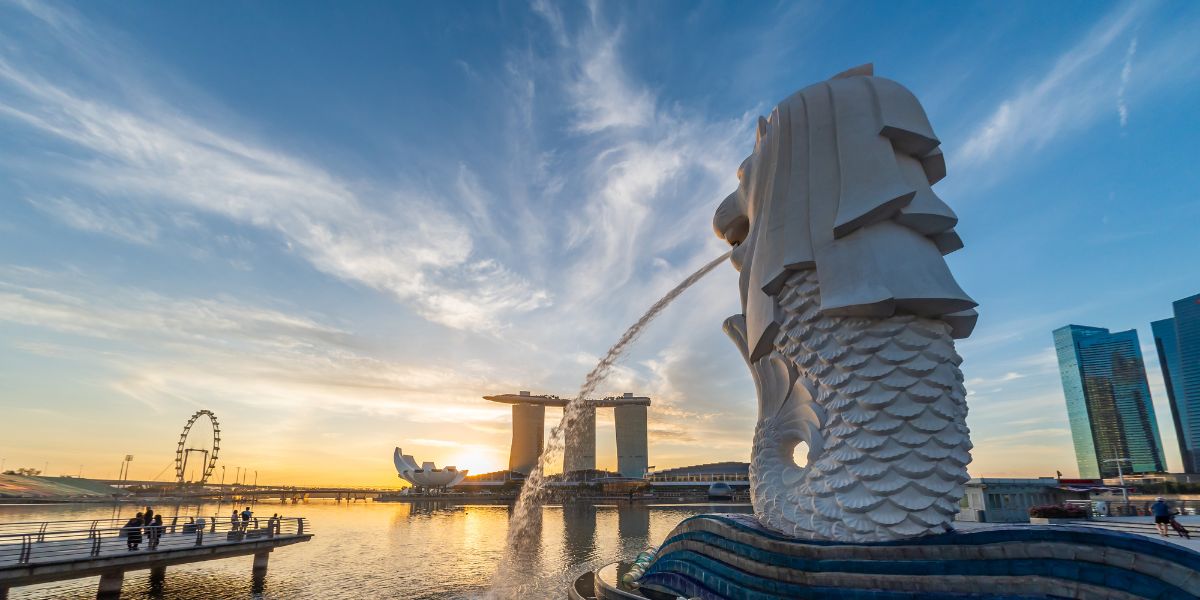
- Natural Escapes: Even though Singapore resembles a typical metropolitan city with tall skyscrapers at every corner, at the heart of this destination lies its green spirited nature, as it has a total green space of 34%! And a few attractions catering to this include Gardens by the Bay, Fort Canning Park, and Bukit Batok Nature Park.
And by 2030, Singapore has pledged to set aside more than 50% more land for nature parks and plans to provide a lush-green park for every household within 10 mins of walking distance! - Sentosa Island: Situated on the southern coast, Sentosa Island is more than just a sightseeing attraction but an exhilarating experience that combines essential travel elements like adventure, food, accommodation, and relaxation!
Home to many popular attractions like the Universal Studios, S.E.A. Aquarium, and Siloso Beach, Sentosa is an unmissable spot for many international tourists visiting Singapore.
Singapore Visa and Required Documents
Nepali tourists are able to travel to Singapore on a visa free policy (for 30 days). Additionally, visitors need to make a Singapore Arrival Card, which can be done 1-3 days before their departure date to this nation. To get the arrival card, you will need to provide passport details, proof of a return flight ticket, and confirmed hotel reservation documents to complete this process.
Required Documents Before Applying:
If you’re applying for the SGAC Card, you will be asked to submit the following information listed down below:
- Personal details: Your full name, date of birth, nationality, occupation, phone number, and place of birth.
- Passport information: Your passport number and date of issue/expiry.
- Travel details: Your intended date of travel, purpose of visit, mode of travel, port of departure, and total number of stay days.
- Accommodation details: Where you’ll be staying in Singapore, such as your accommodation address.
How to Apply for the Singapore Arrival Card?
SGAC (also known as Singapore Arrival Card) is an online arrival travel declaration card that needs to be completed before entering Singapore. This collects your personal, passport, travel, and contact information, which helps authorities keep track of your arrival process and ensure that you have a smooth immigration procedure.
Note: The SGAC has been filled 3 days before the departure date and is completely free of cost.
The steps to apply for the Singapore Arrival Card are listed down below:
Step 1: Access the official Singapore ICA website.
Firstly, you’ll need to access the official Singapore Immigration and Checkpoints Authority (ICA) website in your web browser.
After this, click on the submit online option, and then select the submit SGAC option, and then choose your residency type, which is the foreign visitor/in principal approval holder choice. This will lead to the SGAC form, which you’ll have to complete.
Step 2: Fill in Your Details.
The form is divided into four sections, which are the traveller information, trip information, review, and confirmation.
Start with the first part, which is the traveller information section, which will ask for your personal information like date of arrival, passport number, nationality, place of residence, and other key information.
After filling in all these details, move onto the next section, which is the trip information part, where you’ll have to submit your purpose of travel, mode of travel, and date of departure, among other details.
Step 3: Review All the Information.
The next step is to review all the information that you submitted. Make sure to check all the individual sections correctly so that you can avoid entering incorrect information and facing delays during this process. You’ll also be requested to enter a security verification number at the end as well.
Step 4: Make the Final Confirmation.
Once you’ve submitted the form successfully, you’ll receive a confirmation of your Singapore arrival submission card. You can download a digital copy of this on your phone, as you’ll need upon arrival in Singapore.
Note: Please check the official SGAC website you’re planning to apply for, as requirements for this may be subject to change in the future.
Best Time to Visit Singapore
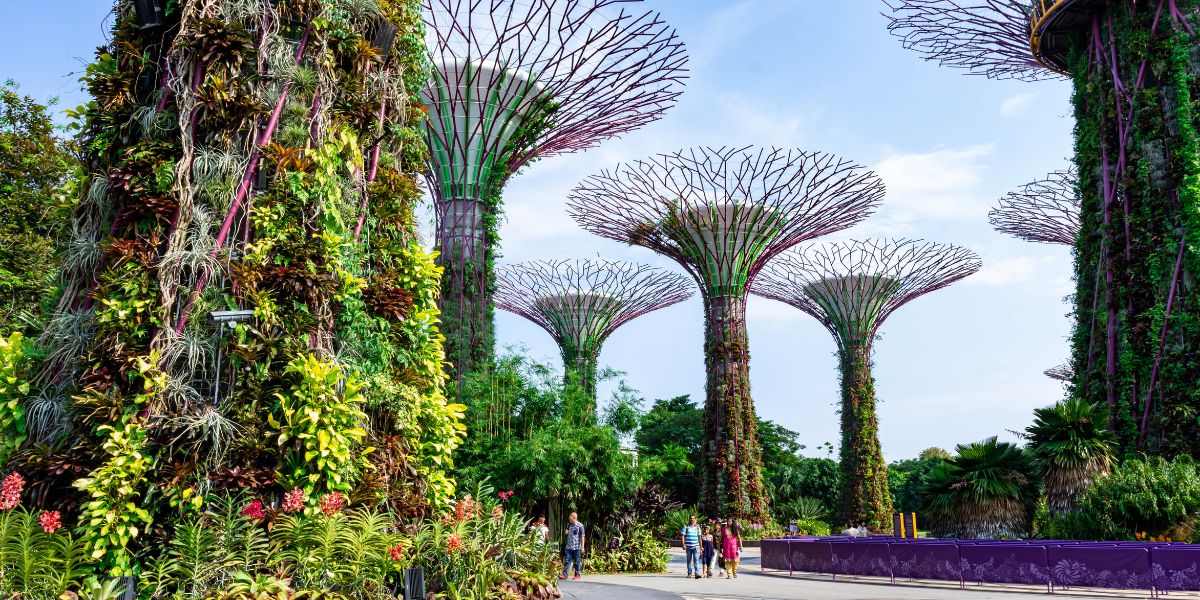
One of the most favorable months to visit the beautiful nation of Singapore is from February to April, as during these months, the climate stays fairly moderate, with temperatures usually ranging from 25 to 32°C, providing plenty of room for outdoor adventures and fun sightseeing activities.
Essential Travel Tips
Here are a few travel tips that you can take a look at before traveling to Singapore:
- Pack for warm weather: Singapore is hot and humid all year round, so make sure you pack clothing items made out of cotton or linen so that they’re easily able to soak in moisture and keep your body cool during sightseeing activities.
- Respect local rules: It is absolutely essential that you follow all the rules and regulations of Singapore as a tourist. For instance, consuming food is strictly prohibited inside of most public transportation systems like MRTs and buses.
- Tipping is not necessary: While dining out, it’s not necessary that you tip the servers in Singapore, as the service charge is also included in the total bill. But if you’d like to tip out of the goodness of your heart, then you can do so as well.
Our Top Selected Singapore Tour Packages
To make your travels in Singapore easier, we have listed a few of our most popular Singapore tour packages that feature the nation’s most renowned destinations like Gardens by the Bay, Mandai Wildlife Reserve, Sentosa Island, and Universal Studios.
Each package has been handcrafted so that you’ll be able to get the perfect mix of adventure, culture, history, and art, helping you gain a range of diverse and unique experiences in the Lion City!
Also, take a look at our newly crafted Singapore Malaysia Tour, which combines both these destinations' historical landmarks, thriving cultural legacy, and plenty of adventures.
India - The Jewel of Asia
|
Official Name |
Republic of India |
|
Capital City |
New Delhi |
|
Popular Cities |
Mumbai, Bangalore, Jaipur, Kolkata, Agra, and Hyderabad |
|
Entry Gateways |
By Air: Delhi, Bangalore, Mumbai, Varanasi, and Kolkata By Road: Gaddachauki/Banbasa (Mahendra Nagar), Rupaidiha (Nepalgunj), Sunauli (Bhairava), Raxaul (Birgunj), Jayanagar (Janakpur), Jogbani (Biratnagar), and Pani Tanki (Kakarvitta) |
|
Time Zone |
IST (India Standard Time), UTC+5:30, 15 minutes ahead of Nepal |
|
Official Currency |
Indian Rupee |
|
Visa Requirements |
Visa Free Policy |
|
Duration |
No fixed tourist visa limit |
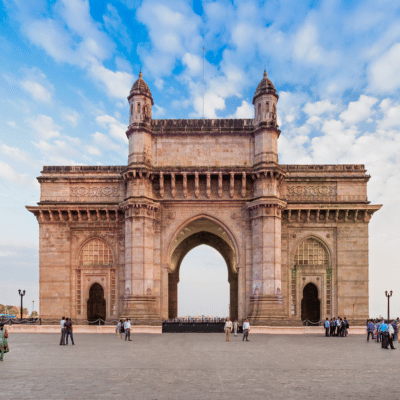
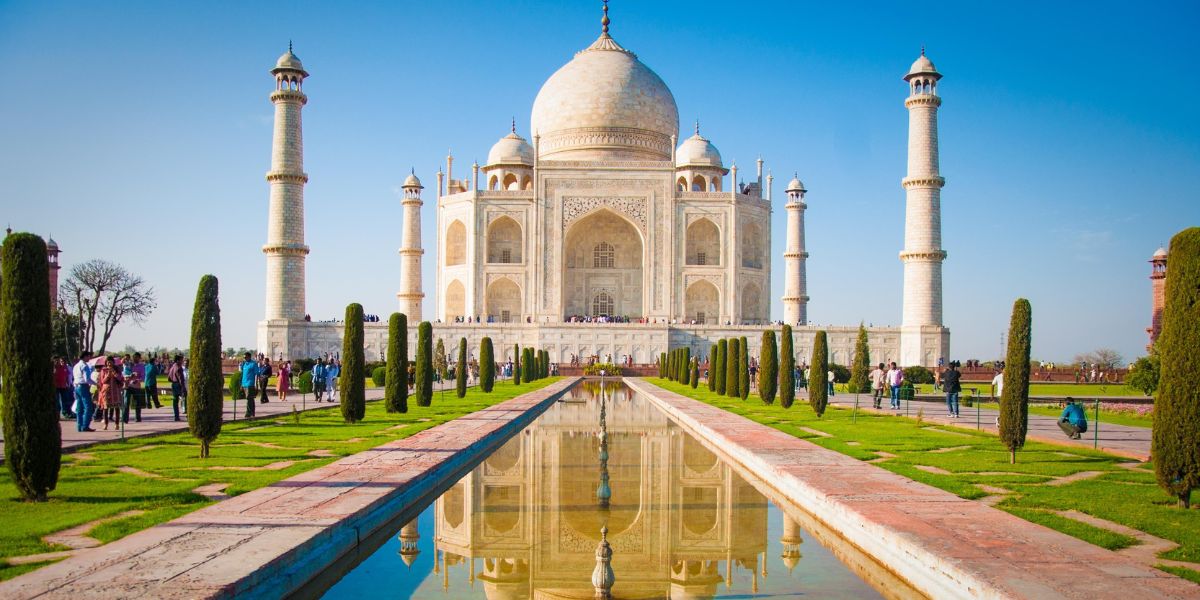
India is a popular destination among Nepali tourists for a number of reasons. The open border, free visa policy, limited language barrier, cultural familiarity, and rich diversity are a few reasons why this nation stands out from the rest of the international destinations.
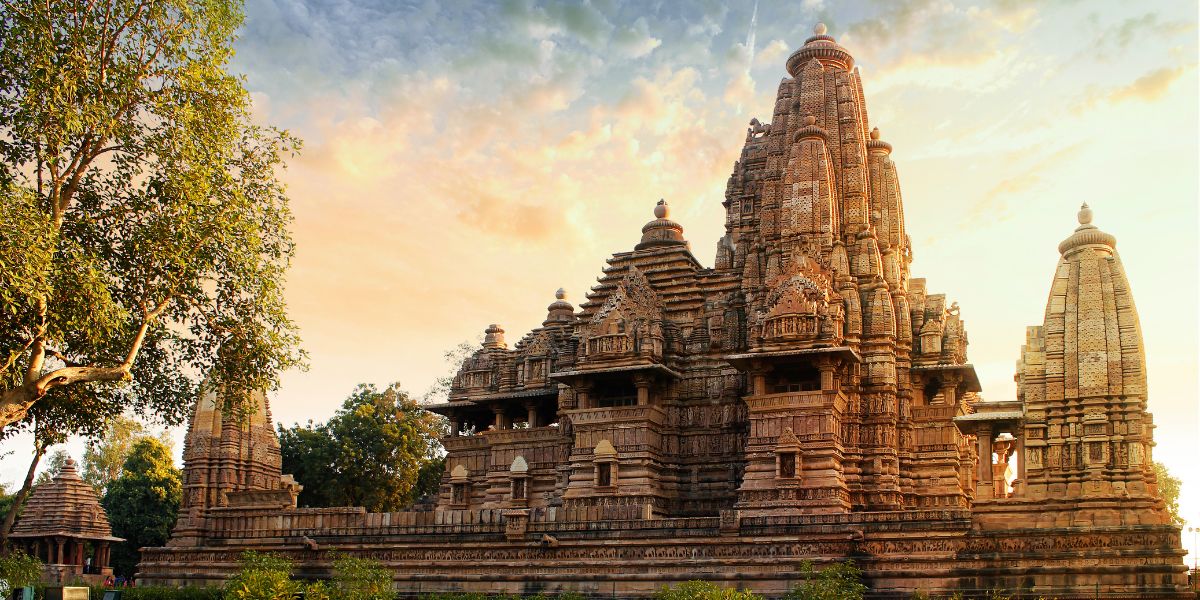
Historical, Cultural and Recreational Attractions
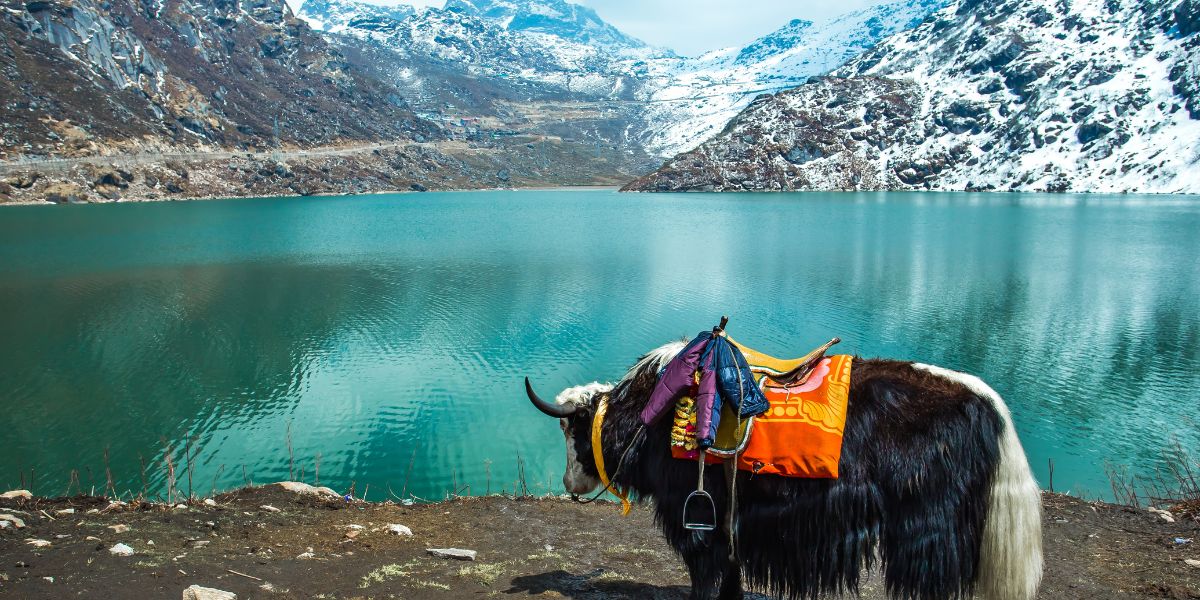
Also known as the “Jewel of Asia”, India is home to a plethora of majestic palaces, historical temples, and bustling open-air markets. Cities like Varanasi, Ayodhya, Delhi, Kolkata, Darjeeling, and Sikkim have flourished for years, welcoming huge numbers of Nepali tourists every year, as these destinations offer an abundance of historical, cultural, and adventurous sightseeing locations.
Affordable Travel and Accommodation
Another reason why India stands out is due to its affordability, as travel-related expenditures such as accommodation, food, and transportation are relatively cheap compared to Western nations like the U.S. and the U.K.
Visa Requirement to Travel to India
Nepali travelers are able to travel to India without a visa as a result of the Indo Nepal Treaty of Peace and Friendship signed by both nations in 1950. This treaty allowed citizens of both nations to freely travel between the countries without acquiring a visa.
Even though you won’t need a visa as a Nepalese citizen to travel to India, just make sure to carry these documents with you for identification:
- Valid identity card, such as an original citizenship or passport.
- For parents traveling with children below 16, please make sure to carry your children’s original birth certificate (issued by the Government of Nepal) and school identity card.
Note: Additionally, for maximum safety, also make sure to also carry digital copies of these documents in case you lose them while traveling.
Best Time to Visit India
Due to India’s massive size, it is divided into various geographical areas, so due to this there is no single time to visit every part of the country. To make things easier, we’ve provided you with the most optimal months to explore various parts of the nation, which are listed down below:
Southern India
- Top tourist spots: Tamil Nadu, Kerala, Karnataka, Hyderabad, and Pondicherry
- Optimal months: November to March
- Suited for: Temple exploration, beach/holiday escapes, road trips, and scenic journeys
Eastern and Northeastern Regions
- Top tourist spots: Kolkata, Bhubaneshwar, Assam, Puri, Sikkim, and Darjeeling
- Optimal months: October to April
- Suited for: Spiritual pilgrimage tours, visiting tea gardens, and exploring cultural attractions
Himalayan Region
- Top tourist spots: Ladakh, Himachal Pradesh, Jammu and Kashmir
- Optimal months: May to September
- Suited for: Outdoor adventure activities like trekking, mountain road trips, visiting temples and monasteries
Central India
- Top tourist spots: Bhopal, Indore, Gwalior, and Jabalpur
- Optimal months: October to March
- Suited for: Visiting national parks and ancient heritage sites and enjoying scenic landscapes
Essential Travel Tips
Before traveling to India, make sure to look at the travel tips listed down below:
- Food and water safety: Before and during your tour days in India, make sure to eat a well-balanced diet consisting of carbs, protein, fats, and fiber so that your energy levels can stay optimized through the trip. In terms of food safety, eat at only hygienic, well-reviewed restaurants and avoid eating spicy/oily foods if you have a sensitive stomach.
Also, carry all the medications you take on a daily basis and consult with your health professional before traveling to ensure that you’re well prepared for the trip. We also suggest you stay hydrated through the trip and take regular needed breaks, especially during busy sightseeing days. - Respect the local culture: When you’re visiting religious attractions, it is important for you to dress appropriately and wear clothes that cover your shoulders and knees, especially when you’re visiting temples, mosques, and churches.
Some places may also require you to remove your shoes before entering so you can wear comfortable footwear, which can easily be changed out of. Carrying a light shawl can also come in handy, as some places can require you to cover your head. - Beware of Scams: Scams are prevalent everywhere, but it is important for you to stay especially alert when you’re traveling to a new destination. We advise you to avoid handing over your passport, personal details, or bank information to anyone you don’t know well or trust during tours.
If you’re traveling solo, then have a person that you can keep in touch with or call during emergencies. We also advise you to be careful around popular tourist attractions, as you may meet scammers who may offer you unofficial guides and high rate tickets. - Apps to Download: These are a few apps that you can download before their trip to India:
- Uber/Ola: For booking transportation
- Zomato/Swiggy: For food deliveries
- Practo: For finding doctors and booking consultations
- WhatsApp: For communication
- IRCTC Rail Connect: For booking trains
Our Top Selected India Tour Packages
With so many states, cities, and towns in India, it can definitely be an overwhelming process for Nepali travelers to find their way through this nation.
And so, with this in mind, we dedicated this section of the blog to highlighting a few of our best selling India travel packages, which feature this country’s most prominent landmarks, colorful markets, and vibrant atmosphere!
- Goa Tour Package
- Tamil Nadu Tour Package
- Varanasi Ayodhya Tour Package
- India Golden Triangle Tour
- Kolkata Bhubaneshwar Tour Package
- Kerala Tour Package
Sri Lanka - Pearl of the Indian Ocean
|
Official Name |
Democratic Socialist Republic of Sri Lanka |
|
Capital City |
Official legislative capital: Sri Jayawardenepura Kotte Executive and judicial capital: Colombo |
|
Popular Cities |
Colombo, Kandy, Galle, and Negombo |
|
Entry Gateways |
By Air: Bandaranaike International Airport (CMB)- (Colombo) |
|
Time Zone |
SLST (Sri Lanka Standard Time), UTC+5:30, 15 minutes behind Nepal |
|
Official Currency |
Sri Lankan Rupee |
|
Visa Requirements |
ETA Policy |
|
Duration |
30 Days |
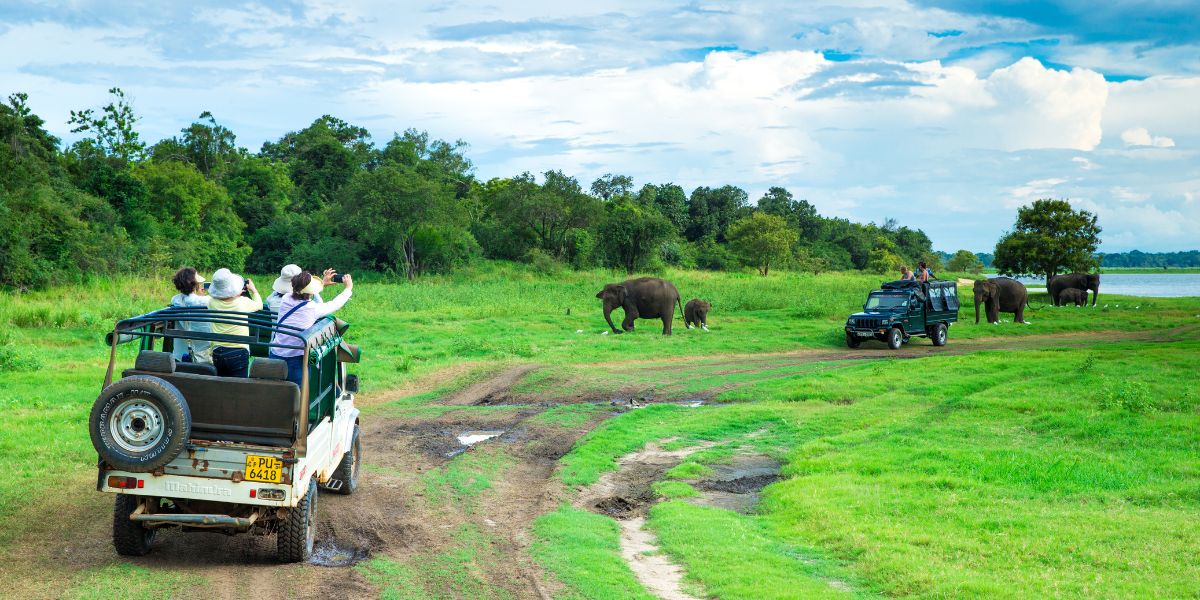
Famed for its ancient Buddhist temples, lush-green tea plantations, serene waterfalls, and warm locals, Sri Lanka is another favorable destination for Nepali tourists.
Explore Sri Lanka’s Famous Destinations
Formerly known as Ceylon, this South Asian nation is made up of 9 provinces, which are further divided into 25 districts consisting of many cities, towns, and villages. A few of the country’s best known destinations include Anuradhapura, Bentota, Sigriya, Galle, and Kandy.
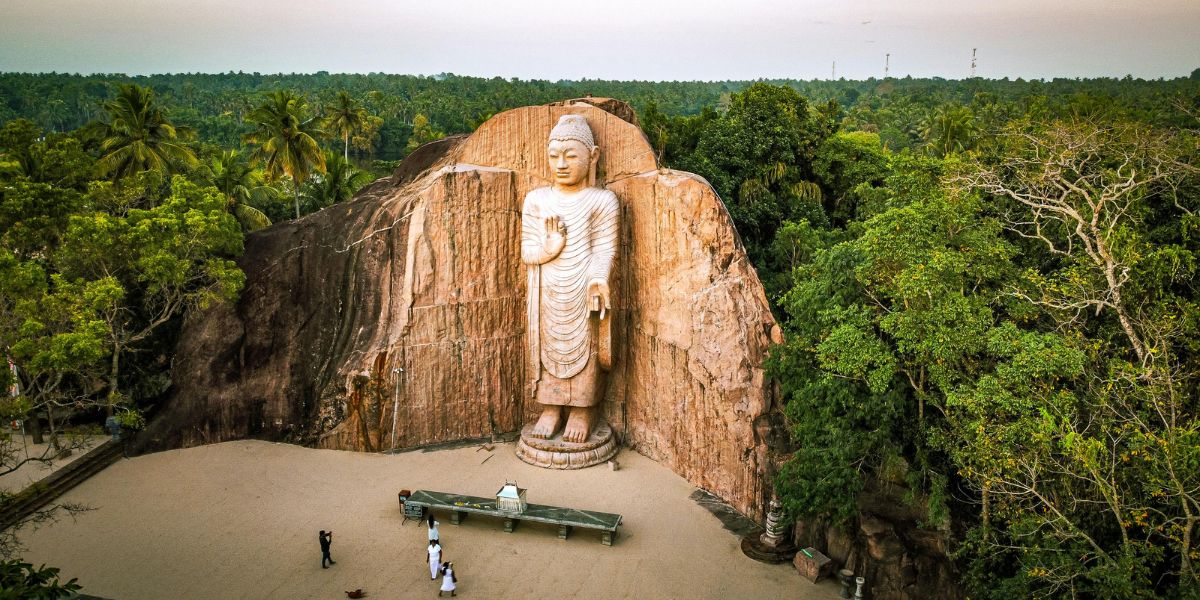
- Buddhist Heritage: Home to 8 UNESCO World Heritage Sites, Sri Lanka also features many sacred Buddhist monasteries and stupas, where a few of the most renowned ones include the Temple of the Tooth Relic, Dambulla Cave Temple, Gangaramaya Temple, Ruwanwelisaya Stupa, and Isurumuniya Temple.
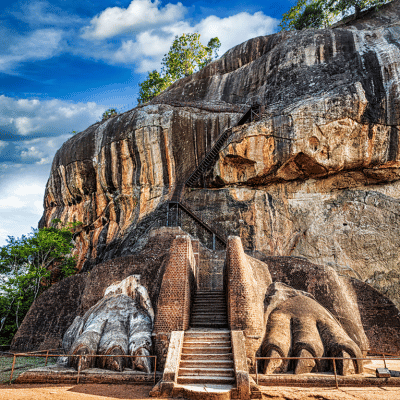
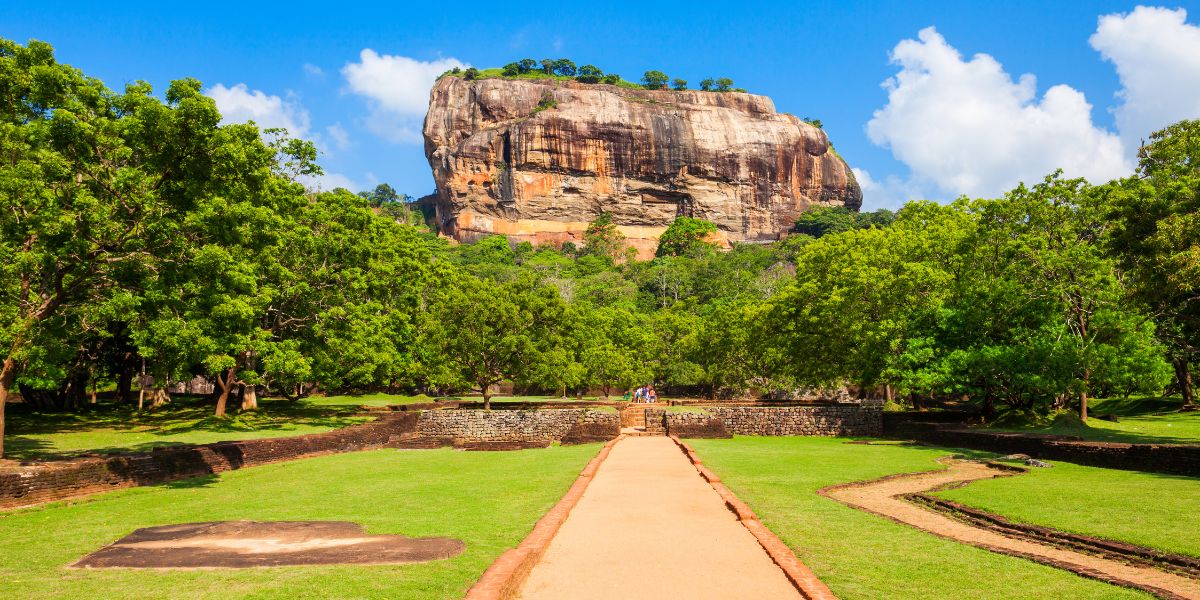
- Sigiriya’s Royal Legacy: The Sigiriya Rock Fortress is one of the nation’s most known destinations, as it served as the royal residence for King Kasyapa from 477 to 495 AD. Consisting of many areas, which are the beautiful gardens (located at the base) and former palace (situated at the summit), terraces, and fortifications, this fortress offers a fascinating glimpse into Sri Lanka’s royal heritage.
- Sri Lanka’s Ancient Past: Similarly, the Polonnaruwa Archaeological Park is another notable destination that functioned as the second capital of Sri Lanka after Anuradhapura from the 11th to the 13th century.
Touring this park will feel as if you have traveled back in time, as it features ancient ruins of Gal Viharas (rock monasteries), royal palaces, and ancient water systems. Additionally, many monuments featured in this city follow a blend of South Indian chola architecture and Buddhist Sinhalese designs.
Enjoy Easy Travel from Nepal
Additionally, proximity and visa protocol are two huge reasons when choosing a destination, and Sri Lanka offers a convenient option for Nepali travelers. It’s relatively close to Nepal, as direct flights often take approximately 4 to 5 hours (from Kathmandu to Colombo).
Sri Lanka’s ETA for Nepalese
The Sri Lanka ETA is an official digital entry permit required for international tourists entering and staying in the nation for short stays for up to 30 days.
Note: This is only applicable for a 30-day double entry tourist visa.
The government of Sri Lanka also made the ETA (electronic travel authorization) free of cost from May 25, 2026, making travel more affordable for Nepali visitors.
|
ETA Type |
Duration |
Type of Entry |
Processing Time |
|
Sri Lanka Tourist ETA |
30 Days |
Double Entry |
2-7 working days |
Required Documents Before Applying
If you’re applying for the online ETA, you will be asked to submit the following information listed down below:
- Personal details: Your full name, date of birth, nationality, occupation, and place of birth.
- Passport information: Your passport number and date of issue/expiry.
- Travel details: Your intended date of travel, purpose of visit, port of departure, airline/flight details, and number of total visa days.
- Contact information: Accommodation details (while staying in Sri Lanka), your email address, and contact number.
How to Apply for the Sri Lanka ETA?
The process of applying for an ETA is pretty straightforward and easy to understand. We’ve also prepared a guide for you on how you can apply for this:
Step 1: Access the Official Sri Lanka ETA.
Firstly, open the official Sri Lanka ETA on your web browser. Then, click on the “Apply Section,” which will take you to a terms and conditions page, and after reading through this, select the “I agree” option located on the bottom.
Step 2: Fill Out the Application Form.
After this, you’ll be taken to the ETA application process page, where there are three types of ETA listed for different purposes. As you are traveling to Sri Lanka for tourism related reasons, select the Tourist ETA and apply for an individual button.
Following this, the applicant information form will appear, which you’ll have to start filling.
- Personal information: Start by entering your personal information like your full name, date of birth, nationality, and other personal details.
- Passport information: Input your passport number, issue date, and expiration date.
Note: Ensure your passport is valid for at least six months from your date of entry into Sri Lanka. - Travel Details: Specify your intended dates of travel, information regarding your last departure country, visa duration days, purpose of visit, and other required information.
- Contact Details: Fill out all the contact information in this section, like the address, city, state, and mobile phone number, among other details that you’ll be staying/using in Sri Lanka.
- Declaration: Then, complete the declaration section, which lists out a couple of questions, and click on the confirmation button.
Step 3: Review Before Submission.
Once you have completed filling out the form, make sure to review everything and likewise make any corrections if needed. The processing time for the ETA will take around 2-7 working days or, at times, can take even longer, so we recommend you plan your trip accordingly.
Step 4: Receive ETA Approval.
Once the application is processed, you will receive the ETA via email. You can download this on your phone and make a physical copy of it.
Note: Please check the official ETA website you’re planning to apply for, as requirements for this may be subject to change in the future.
Best Time to Visit Sri Lanka
Due to Sri Lanka’s geographical location, as it is situated near the equator, it has a tropical climate influenced by two seasons, which are the southwest monsoon (May to September) and northeast monsoon (October to February).
The Yala (also known as the southwest monsoon) affects the south and west areas, which are composed of places like Colombo, Galle, Ella, and Sigriya, so the most favorable months to explore these sites are from December to April, whereas the Maha, referred to as the northeast monsoon, impacts the northern and eastern regions.
The months from May to September are ideal to explore the northeast regions due to moderate climate and pleasant weather.
Essential Travel Tips
Here are a few travel tips that you can take a look at before traveling to Sri Lanka:
- Respect Local Cultures and Customs: Sri Lanka is a predominantly Buddhist nation, and so there are plenty of ancient temples, monasteries, and shrines located in many parts of the nation.
When you’re visiting these sacred sites, make sure that you wear modest clothing as a sign of respect. Always ask for permission when taking pictures of local people. - Always Carry Some Cash: Though many tourist centered areas in Sri Lanka accept credit cards, cash is still widely used, especially if you’re visiting smaller towns, local markets, and road side shops.
So, always carry some Sri Lankan rupees with you when dining at local restaurants and exploring markets. - Enjoy the Local Food: One of the best ways that you can immerse yourself in Sri Lanka’s rich cultural heritage is through its diverse and mouthwatering food cuisines!
Try popular food items like Jaffna crab curry, kottu roti (chopped flatbread served with vegetables and meat), idiyappam (string hoppers), and parippu curry (creamy lentil curry) that are sure to make you fall in love with Sri Lankan cuisine.
Our Top Selected Sri Lanka Tour Packages
Discover the beauty of Sri Lanka with our most loved Sri Lanka tours! Each package is designed to showcase the country’s rich history, unique identity, and thriving cultural legacy.
- Best Sri Lanka Tour Package
- Sri Lanka Tour Package
- Short Sri Lanka Tour Package
- Sri Lanka Buddhist Tour Package
Maldives - The Tropical Paradise
|
Official Name |
The Republic of Maldives |
|
Capital City |
Male |
|
Popular Areas |
Hulhumale Island, Male City, Gaafu Alifu Atoll, and Noonu Atoll |
|
Entry Gateways |
By Air: Velana International Airport |
|
Time Zone |
MVT (Maldives Time), UTC+5, 45 minutes behind Nepal |
|
Official Currency |
Maldivian Rufiyaa |
|
Visa Requirements |
Visa on Arrival Policy |
|
Duration |
30 Days |
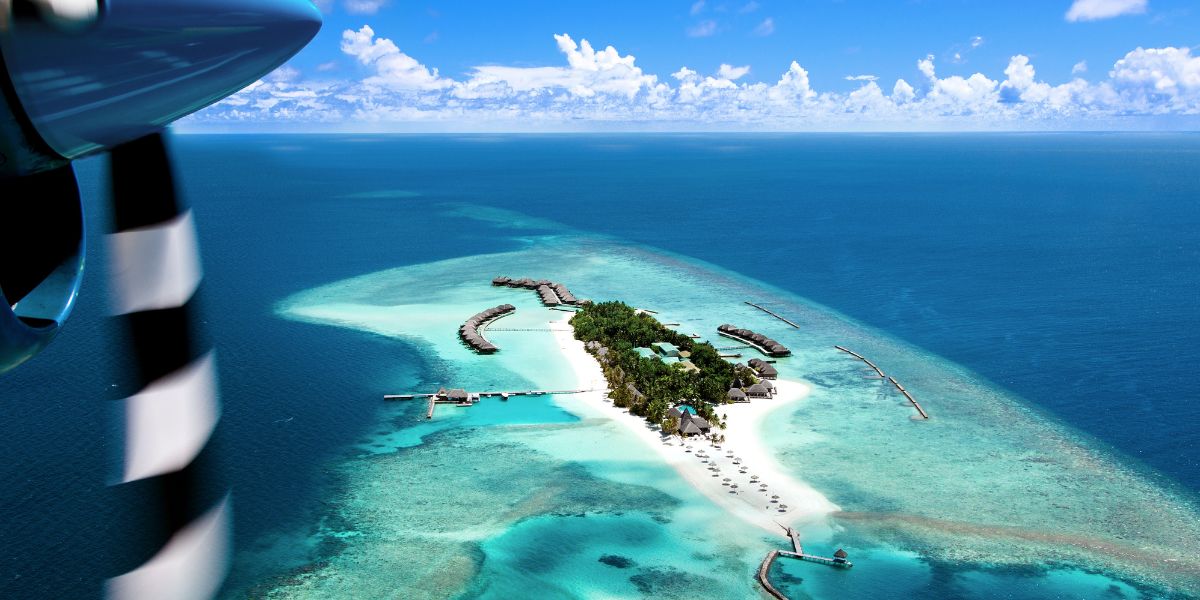
From having beaches that glow at night to dining underwater restaurants, the Maldives is surely one of Asia’s most fascinating nations! Even though it’s Asia’s smallest nation (by land area), it comprises 1192 islands!
Discover What Makes the Maldives Unique
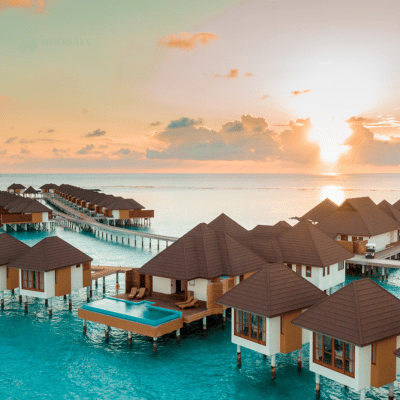
What makes the Maldives particularly appealing is its exclusive accommodation experiences. Travelers here can choose from private over-water bungalows, aesthetic garden villas and luxurious beach resorts that cannot be easily found elsewhere in the world.
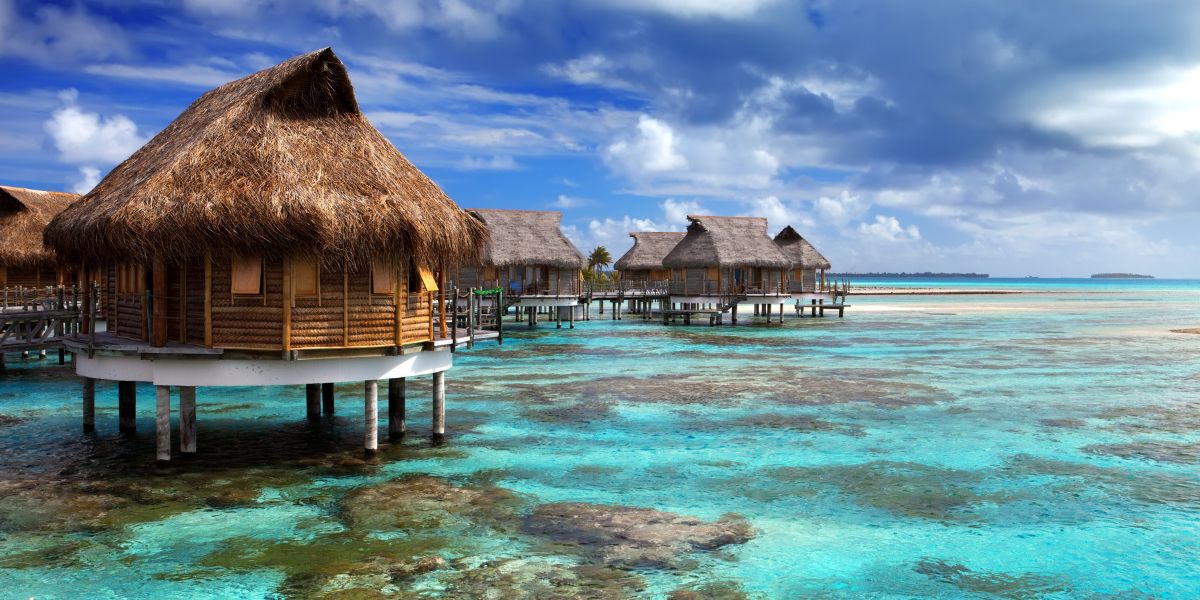
With Male being the capital city, the Maldives has been a tourist hub in recent times. Destinations like Male, Hulhumale, South Male, North Male, Addu, and Maafushi are visited by huge numbers of tourists, as they are known for their luxurious accommodations, tranquil atmosphere, rich biodiversity, and spectacular food cuisines.
Moreover, the Maldives is also considered a “top honeymoon destination” and is best suited for couples who are looking for a romantic getaway after their wedding.
Plus, many of these accommodation spots also offer a plethora of top-notch services like 24-hour room service/security, in-villa spa treatment, airport pick-up and drop-off and other various recreational services catering to the ultimate comfort and convenience of international travelers.
Enjoy an Easy Visa on Arrival Policy
Nepali travelers can obtain a visa on arrival when visiting the Maldives, meaning the tourist visa is issued after they’ve arrived in the Maldives. Upon arrival, the immigration officials at the airport will check the traveler’s documents and entry requirements and then issue the visa accordingly.
One major advantage of this is that travelers can avoid the tedious process of applying for a traditional visa and other associated needs that often come with applying for a visa, like filling out pre-travel applications, going for embassy visits, and paying visa fees.
How to apply for the IMUGA Traveller Declaration?
The IMUGA traveller declaration is a mandatory digital entry permit that all international travelers must fill out before traveling to the Maldives. As the process of applying is simple and can be completed online, we’ve provided you with a simple guideline on how to complete the declaration correctly and ensure your trip to the Maldives.
Before we get on with explaining the visa application process, let’s have a quick look into essential travel documents you will need before applying.
During your travel to the Maldives, make sure to carry these documents with you:
- Original passport (with 6 months of validity).
- Confirmed return or onward ticket.
- Proof of accommodation for the duration of stay.
Note: Additionally, for maximum safety, also make sure to also carry digital copies of these documents in case you lose them while traveling. Furthermore, visitors also need the IMUGA traveler declaration.
Step 1: Access the Official Imuga Declaration Website.
Firstly, open the official IMUGA traveller declaration website on your web browser. Then after, click on the new declaration option, as you are starting a new application.
After this, you’ll have to upload the scanned copy of your passport and then select the purpose of your visit to the Maldives, which is the “Holiday” option.
Step 2: Fill in Your Personal Details.
Then, start entering your personal details, like your full name, date of birth, passport number, country of residence, email address, and other essential information.
Make sure that the details you enter match your passport and recheck all the information before proceeding to the next step. At the end you’ll have to upload a scanned copy of your photo as well.
Step 3: Provide Your Travel Details.
Following this, you’ll also input your travel details, like the origin country of departure, port of entry, arrival/departure date, flight number, and accommodation details.
Step 4: Complete the Health Declaration.
This section lists out a few African and South American nations and asks you if you’ve traveled to any one of these countries in the last 6 days before your departure date to the Maldives or if you've transited through an airport for more than 12 hours in one of the nations given in the list. If you have then you’ll have to upload a scanned copy of a yellow fever vaccination certificate.
Step 5: Complete the Customs Declaration.
This part of the form asks you to declare all the items that you’ll be taking to the Maldives. You’ll be asked to state the number of check-in bags and if you’re carrying any prohibited, restricted, or over the counter drugs.
Read all the questions carefully and provide accurate information based on the items you may be carrying. After answering these questions, click on the finish button to submit the declaration.
Step 6: Receive the Declaration.
Once you’ve completed the process, you’ll receive your traveler declaration that states your name, passport number, traveller code, and arrival date. You can save this on your mobile device or even make a physical copy of it.
Note: The IMUGA Traveller Declaration is free of cost and must be done 96 hours before one’s arrival date to the Maldives.
Best Time to Travel to the Maldives
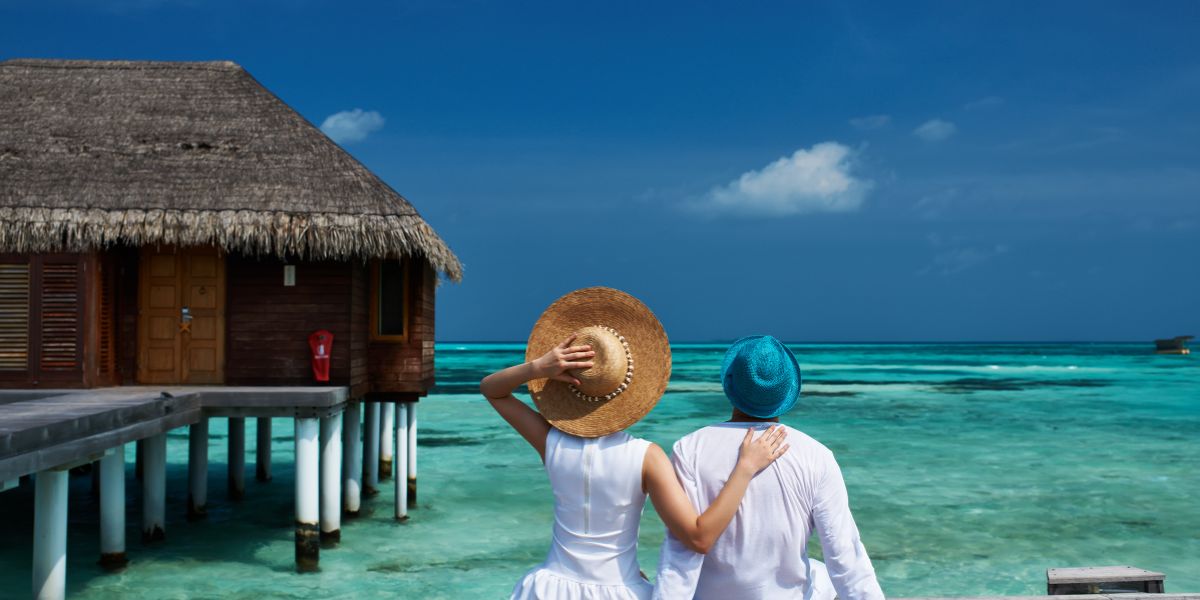
The dry season, which runs from November to April, is considered to be one of the most favorable periods to visit the Maldives. During the months, the weather stays mostly sunny with low rainfall, creating the perfect atmosphere for engaging in many water sport activities.
Essential Travel Tips
Here are a few travel tips that you can take a look at before traveling to the Maldives:
- Respect the local culture: As the Maldives is a predominantly Muslim city, make sure to look into the local customs and traditions followed here so that you can avoid instances of any cultural mishaps and cultural insensitivities.
Additionally, it is also advised to dress modestly and pick clothing items that cover your knees and shoulders in public places, especially when visiting religious sites like mosques and temples. Moreover, PDA (public affection displays) are also strictly frowned upon, so it is also advised to avoid these as well.
Do not bring any alcoholic beverages, pork products, narcotics, or illegal drugs, as these are strictly prohibited. If you’re visiting religious sites, then make sure that you wear moderate clothing items that cover your shoulders and knees. - Pack all the essentials: The Maldives is one of those destinations that is hot and humid all year round, and to survive this weather, you need to pack smartly. Pack lightweight clothes that are made out of cotton or linen materials, as they feel cool on the skin and also easily soak up moisture.
Furthermore, make sure that you also carry travel essentials like hats/caps, sunglasses, sunscreen, a water bottle, and type G or D power plugs that operate at 240 voltage and 50 Hz, among other travel essentials. - Choose the correct travel time: The Maldives celebrate various Islamic festivals throughout the year. Ramadan is one of the country’s most renowned festivals and is widely celebrated by the Muslim community.
During this period, the working hours of many local restaurants, sightseeing destinations, and markets can be affected, so you should look into when these important festivals occur before finalizing your travel arrival and departure date.
Our Top Selected Maldives Tour Packages
Escape to the world of ocean blue waters, warm sandy beaches, and delectable Maldivian cuisines with the love of your life with our Maldives honeymoon tour packages!
Whether you’re looking to plan your first holiday trip as newlyweds or want a luxurious honeymoon tour, we have curated the perfect tours to make your days in the Maldives truly memorable.
Phillipines - Pearl of the Orient Seas
|
Official Name |
The Republic of the Philippines |
|
Capital City |
Manila |
|
Popular Destinations |
Manila, Cebu, Davao, and islands like Boraca and Palawan |
|
Entry Gateways |
By Air: Ninoy Aquino International Airport (Manila), Mactan Cebu International Airport (Cebu) |
|
Time Zone |
PHT (Philippine Time), GMT+8, 2 hours and 15 minutes ahead of Nepal |
|
Official Currency |
Philippine Peso |
|
Visa Requirements |
Visa Free Policy |
|
Duration |
30 Days |
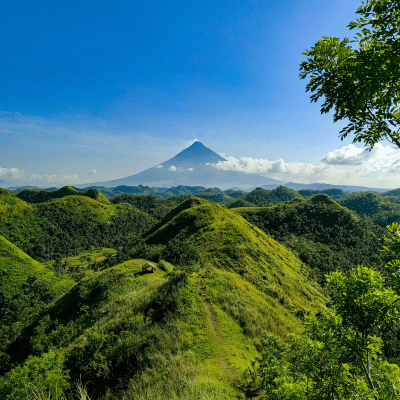
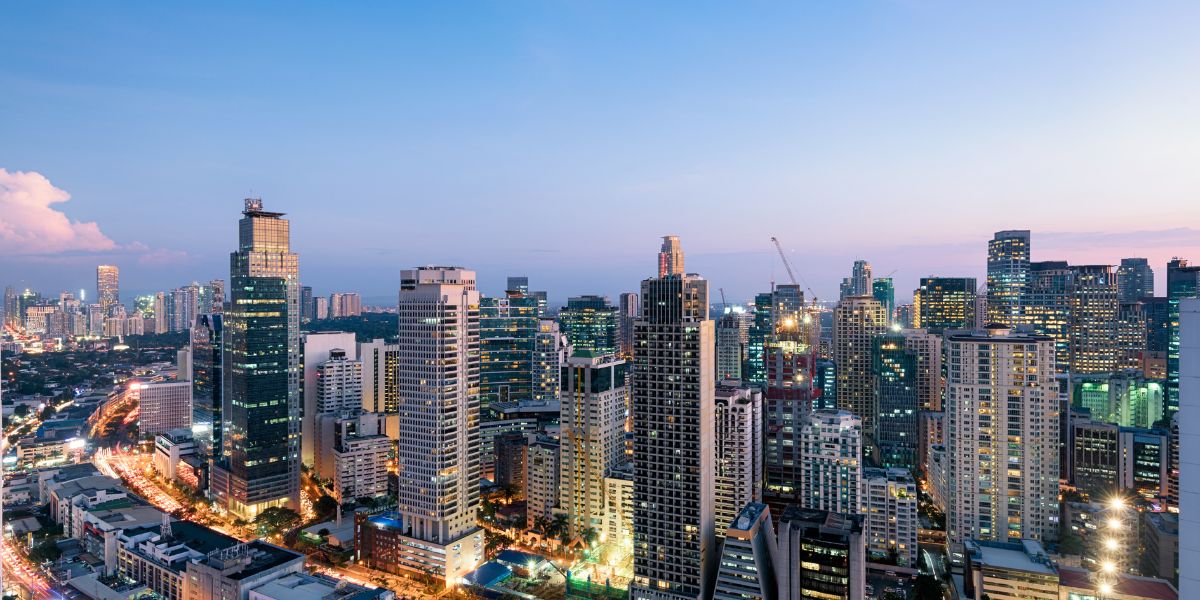
Home to more than 6000 islands, the Philippines is an island nation situated in Southeast Asia. Famed for its historical cities, colorful neighborhoods, and ancient cathedrals, this country provides a perfect blend of history and natural beauty.
Top Tourist Destinations in the Philippines
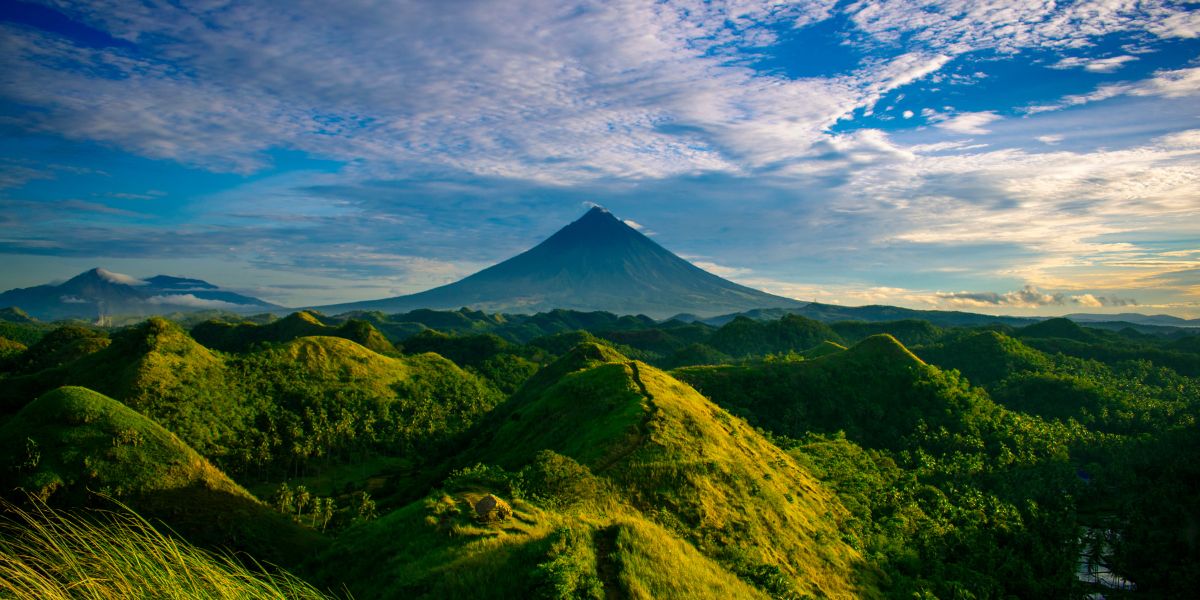
The Philippines is divided into 18 administrative regions, which are further separated into various provinces, municipalities, cities, and towns. Popular destinations like Manila, Cebu, Boracay, Vigan, Palawan, Pasay, Davao, and Angeles have captured the heart and soul of this nation for decades and are often the go-to spots for many tourists, as they provide the perfect mix of historical tours, scenic retreats, and culinary experiences.
Philippines Visa for Nepali Travelers
For many Nepali travelers, this nation can be a suitable travel destination due to its 30-day visa free policy, which allows one to enter and stay in this nation for a month.
During your travel to the Philippines, make sure to carry these essential travel documents with you:
- Original passport (with 6 months of validity).
- Confirmed return or onward ticket.
- Proof of accommodation for the duration of stay.
Note: Additionally, for maximum safety, also make sure to also carry digital copies of these documents in case you lose them while traveling. Furthermore, visitors also need the Philippines digital arrival card.
How to apply for the Philippines Digital Arrival Card?
The Philippines Digital Arrival Card is a mandatory online travel declaration document that all international travelers must acquire before traveling to the Philippines. This digital travel card keeps a record of your arrival/departure dates, personal information, passport, health, and customs information during your stay in the nation.
The process of applying is straightforward, easy to understand, and can be done entirely online. To help you avoid any confusion, we’ve outlined all the steps you need to follow for a smooth trip to the Philippines.
Step 1: Access the Official Website.
Firstly, you have to open the Official Philippine Travel Information System (e-travel) website in your web browser. You’ll need to make an account first with your email, so go ahead and complete the registration process. After making this, sign in using the registered email and password.
Step 2: Fill in Your Personal Details.
After signing in, you’ll be led to the personal information section, where you’ll have to upload a scanned copy of your photo and passport. Following this, you’ll have to fill in your details like your full name, date of birth, phone number, citizenship, country of birth and passport number. Make sure to check all the details thoroughly before moving on to the next step.
Step 3: Provide Your Accomodation Details.
Next, you’ll need to enter your accommodation details like your permanent country of residence and details of the city/state/province and residential address. Review all the details carefully and make sure everything is accurate.
Step 4: Complete the Traveler Declaration.
Then, you’ll be led to the traveler declaration section, if you’re applying for yourself, click the “For Me” option, but if you’re filling the application for others, then choose the “For Other” button. Likewise, also choose the mode of transportation that you’ll be using to reach the Philippines, which is either “Air” or “Sea”.
Step 5: State Your Travel Purpose.
Following this, you’ll have to then state your purpose of travel. There will be many options available for this, but as you’re traveling to the Philippines for tourism purposes, choose the “Holiday/Pleasure/Vacation” option.
Also, put in your flight information as well and enter the name of the airlines and flight number. After this, you’ll also have to fill in the country of origin, airport of origin, date of departure, and date of return, among other essential information. If you’re taking a transit flight, also enter this information as well.
Step 6: Enter Your Accomodation Details.
Continuing on, enter your accommodation details while staying in the Philippines, like the address of your hotel/resort or other accommodation.
Step 7: Complete the Health Declaration.
Here, you’ll have to answer questions related to your health status through a yes/no questionnaire. After answering all these queries, review your responses and click the next option.
Step 8: Declare Your Baggage Declaration.
In this section, you’ll be asked to provide details about the baggage and items that you’re bringing to the Philippines. There will also be a declaration regarding all the baggage and items one can bring to the nation, so read this carefully before proceeding. If you have any baggage or currency to declare, then choose the “yes” option and fill in this information.
You will also have to fill in other travel details like whether you’re traveling with any family, number of baggage, and if it's your first time visiting the Philippines. Enter all the correct information before moving on to the next section. Then, you’ll also have to put in your signature as well.
Step 9: Recheck and Submit.
Make sure to thoroughly recheck all the information before submitting. After the submission, you’ll be provided with a QR code, which has all your travel declaration details. Save the QR code on your phone or keep a screenshot of it, as you may need to present it to immigration authorities upon arrival in the Philippines.
Note: The Philippines Digital Arrival Card is completely free of cost and must be done 72 hours prior to one’s departure date to the Philippines.
Essential Travel Tips
Here are a few travel tips that you can take a look at before traveling to the Philippines:
- Learn a few basic Filipino phrases: Though English is spoken in many tourist areas, the majority of local people still speak Filipino.
Before visiting the Philippines, you can also learn to speak a few words and phrases in your free time, like: - Kumusta: How are you?
- Magandang Umaga: Good morning
- Magandang hapon: Good afternoon
- Salamat: Thank you
- Magkano?: How much?
- Tulong: Help
Learning simple conversational phrases like these will help you communicate and even impress a few locals during your travel days in the Philippines for sure.
- Book flights early: If your tour in the Philippines consists of many domestic flights, then booking earlier can help you save on costs. Both international and domestic flights can become more expensive as the travel dates get closer, especially during peak seasons, holidays, and festivals.
- Always carry some cash: In many parts of the Philippines, cash is still the most common method of payment, especially at local markets, eateries, and small shops. While cards and digital payments are accepted, it’s always a good idea to carry some cash with you in case electronic methods aren’t available.
Best Time to Visit the Philippines
In a general sense, the most ideal time to visit the Philippines is during the dry season, which begins in December and lasts till May, whereas the rainy season starts in November and continues through June.
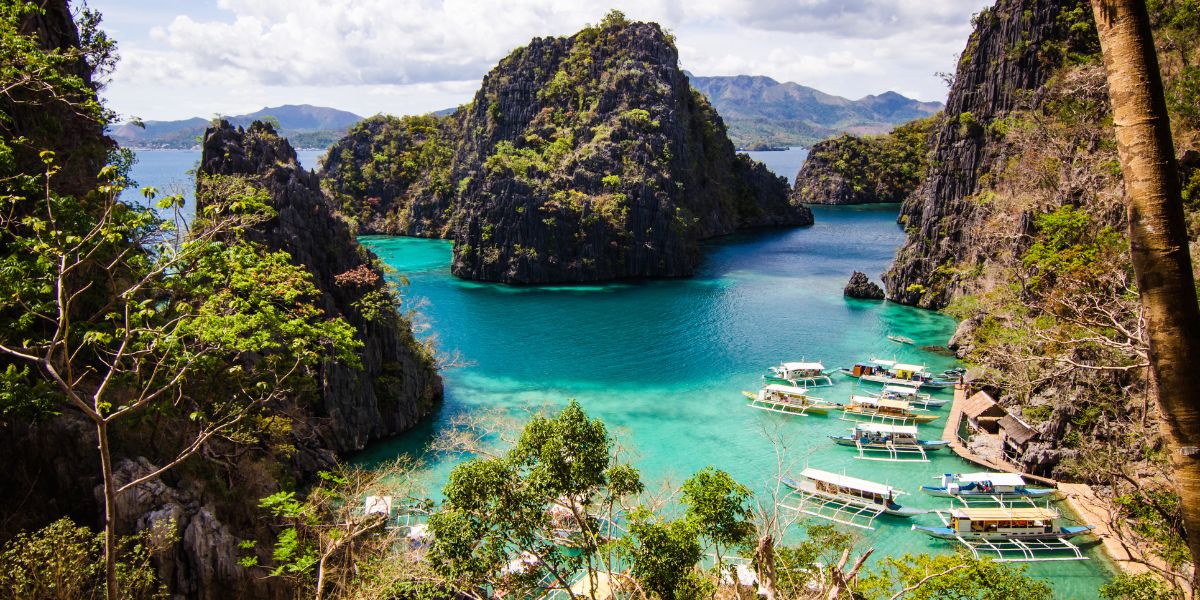
During this period, many parts of the country experience warm temperatures, clearer skies, and relatively low rainfall. Destinations like Manila, El Nido, Busuanga, Cebu, Palawan, and Boracay are some must-see destinations, as they are brimming with tourists and locals, as these months are also considered one of the peak seasons to visit the Philippines.
Our Top Selected Philippines Tour Package
If you’re planning to visit the Philippines in the near future, then our Classic Philippines Tour Package can be the perfect introduction to this amazing nation! Travelling around popular destinations like Bohol, Manila, and Boracay, this tour is all you’ll be needing, as it will take you on unforgettable adventures.
Why Travel with Holidays to Nepal?
Being one of Nepal’s top rated travel agencies, Holidays to Nepal is a government registered, employee-owned tour company established in 2013. Having 10+ years of travel experience, our company offers detailed curated travel packages mainly focusing on Asian destinations like Singapore, India, the Maldives, Sri Lanka, the Philippines, and many more.
As these destinations have easy visa entries, these are perfectly suitable for Nepali travelers looking for simple, budget-friendly, and stress-free international holidays. As passionate travel experts, we also prioritize personalized services and strive to exceed expectations, as each part of your journey can easily be customised and tailored to fit your needs.
Essential travel aspects like sightseeing destinations, tour duration, and hotel category can all be adjusted, as our top priority remains on providing you with ultimate satisfaction.
So, if you’re planning to travel to any of the destinations listed on our website this year, then reach out to us via our WhatsApp number or send us a quick query through our website, or email us at outbound@holidaystonepal.com. We're here to plan your perfect holiday from start to finish.
Frequently Asked Questions (FAQs)
Which of these destinations is best for an international trip?
This depends upon your own travel interests and preferences. India is suitable for cultural and pilgrimage tours, whereas Singapore is ideal for city lovers, families, and food lovers.
The Maldives is popular for honeymooners and luxury holidays, while Sri Lanka is known for its Buddhist heritage and natural scenery.
The Philippines is perfect for island hopping and adventure enthusiasts.
Can I travel to these nations with only a Nepali citizenship card?
No, a Nepali citizenship card is not enough for you to travel to these nations. A valid passport (with a 6 month validity), a return or onward flight ticket, accommodation confirmation, a digital arrival card and any other necessary travel documents (depending on the country’s requirement) are also needed as well.
We also recommend checking the official visa website for the latest visa requirements and required travel documents before your trip.
Can I combine destinations like India and Sri Lanka on the same trip?
Yes, absolutely. Combining India and Sri Lanka can be a great way for you to explore South Asia. We do offer combined trips (listed on this blog and our website) as well, where you can visit multiple destinations in one single tour.
What languages are spoken in the destinations?
For this, please refer down below:
|
Nation |
Languages Spoken |
|
Singapore |
English, Mandarin, Malay, and Tamil |
|
India |
Hindi, English, Bengali, Telugu, Marathi, Tamil, and many others |
|
Sri Lanka |
Sinhala, Tamil and English |
|
The Maldives |
Dhivehi and English |
|
The Philippines |
Filipino, Cebuano, Ilocano, Hiligaynon, and English |
Do I need any vaccinations or medical certificates while traveling to all the nations mentioned in this blog?
Besides the Maldives (only in special cases), you are not required to submit any vaccination certificates or medical documents to visit other countries mentioned in this blog as of September 2026.
What medical or vaccination document is required for the Maldives?
The IMUGA traveller declaration is a compulsory document that all Nepali travelers have to apply for before traveling to the Maldives.
If you have traveled to any of the African and South American nations in the last 6 days (given in the application form) prior to your departure or transited through an airport in any of those countries for more than 12 hours, you’ll be required to upload a scanned copy of your yellow fever vaccination certificate as part of the application.